Virtualization, Cloud, Infrastructure and all that stuff in-between
My ramblings on the stuff that holds it all together
Platespin PowerConvert Part 2: P2V
Posted by on November 26, 2008
Following on from the previous overview post, My goal here is to do a live P2V of a Windows 2003 Server installation on an old laptop into a virtual machine running on my D530 ESX farm, and just to make things “interesting” the laptop is also running Exchange 2003 🙂
And once this is completed I’ve got a 2nd laptop to which I want to convert the virtual machine onto (V2P).
I’ve implemented PowerConvert in a VM, and all hosts are connected over a gigabit ethernet switch (although the source laptop only has a 10/100 NIC.
I’m aiming to use the live transfer (with snapshot) feature which handles clean-snapshots of all the Exchange and AD databases using Windows Volume Shadow Services (VSS).
The initial screen is below, to get to this stage you need to discover hosts – which can be done via IP address, hostname or network discovery (via listening to broadcasts) – it’s recommended that you discover/refresh each source and target server before doing any migrations – the data is held in an internal MSDE database and is not automatically refreshed.

Select the source and right-click – or you can drag and drop it to the target (i.e physical server booted from a “Take Control” CD or host running a supported (and previously discovered) Hypervisor.

It detects that Exchange is installed on the source
![]()

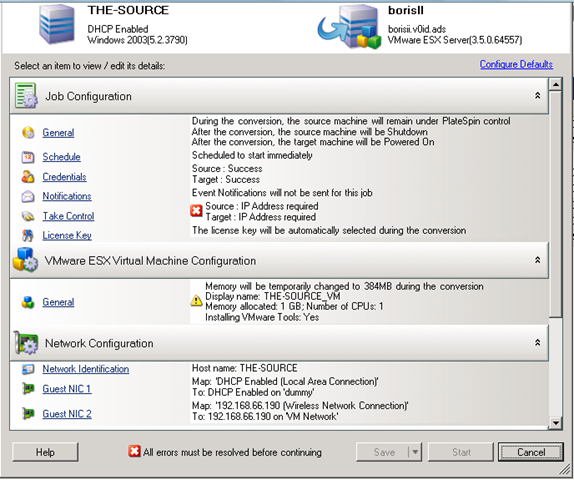
Advanced view; note red X marks areas that need attention.
Choose which type of transfer
Take Control – “Cold clone” boot source from custom WinPE CD.
Live – File based (file by file copy, suitable for simple servers)
Live – Block Based (faster than file-copy)
Live – Snapshot (uses VSS, supported for applications like Exchange, SQL etc.)
Note the options for what to do with the source machine once the conversion has completed; if you are doing a move like we are you don’t want the source machine left on the network as you will have an IP/name conflict or worse users changing data – so shut it down.

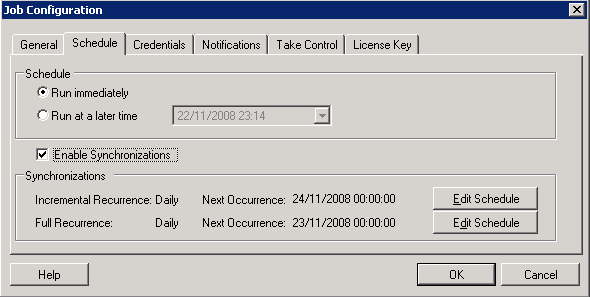
Synchronisation options, handy if you have a lot of data to migrate and want to prep the target some time ahead of a cut-over.
Also used by the workload protection feature (x2V DR) – which is very cool and will be the subject of a future post.
This is an annoying bit where it doesn’t automatically adjust the path to the VM files if you change the virtual machine name – so make sure you edit the path manually as required.

You can choose target resource pool on an ESX server; but as far as I can tell it’s not specifically aware of DRS, virtual centre or different clusters – it’s host only driven.

Moving from single CPU Physical box to dual CPU VM (and vice-versa) is just a check-box.

Note this will replace a file; which is the multiprocessor HAL due to the above option.

An option to sysprep/rename etc. the clone (not used here as we are “moving” i.e decommissioning the source machine)

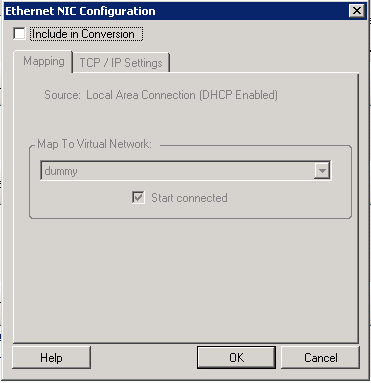
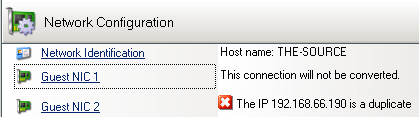
Picked up an unused NIC from the source laptop – chose to exclude from conversion

Options to choose/resize disks etc.

Job breakdown and monitor screen – this is where you can monitor the progress of the job – there is very little feedback on the console of either the source or target machines as part of this process.
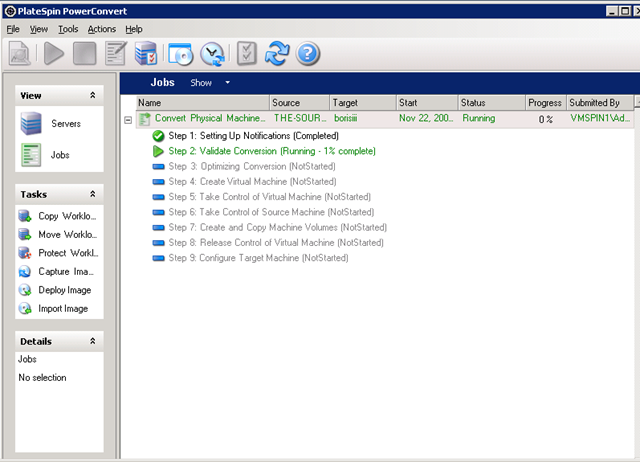
The PlateSpin controller talks to ESX and creates blank VM that will become the target machine
![]()

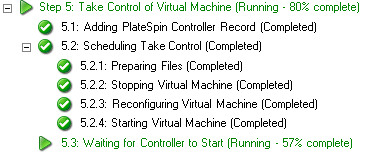
PlateSpin boots the target VM into WinPE

Open console on the VM Platespin has created and you’ll see what it’s doing.
![]()
At this stage it has copied a WinPE.iso file to the ESX host and mounted it in the VM and boots the VM from it…

Target (blank) VM booting up, starting networking etc.

WinPE app contacts PowerConvert server via HTTP and downloads its job info


Once it’s finished copying data from the source to the target, it starts up in DS safe mode (as I’m P2V’ing a domain controller) – it seems to run some fix-up scripts in the background during this stage as it sits at the DS-safe mode logon prompt for a while before rebooting.


it’s done now, and rebooting out of DS safe mode.
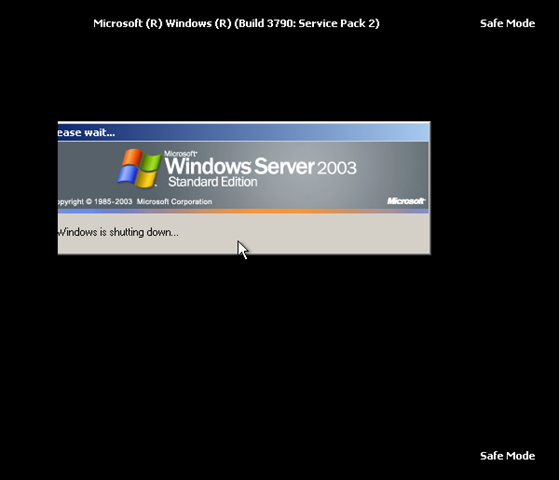
Note, it uses GRUB in the process to control what is booted – this is cleaned up in the final stage.

1st normal boot

Ta-Da, all running with all services, databases and applications intact.

Completed job screen on the PlateSpin PowerConvert Client.
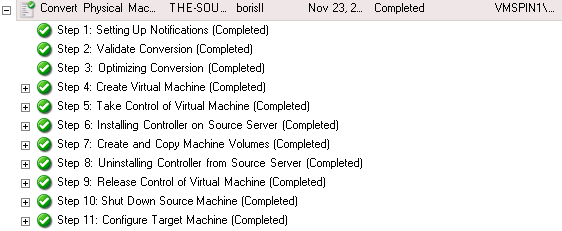
Note – that this “burns” one of the licences – you pay per conversion, unless you have a particular type of licence – full details and options here

The next post will be to take the virtual machine we have created via P2V and convert it back to a physical machine again (V2P). This is the clever bit that PlateSpin PowerConvert brings to the table over all other products on the market.

